Windows 7 Feature Focus – Backup and Restore
Windows Vista replaced the antiquated, tape-oriented Windows NT Backup wizard with a new backup system optimized for external hard disks, and some editions also included true "bare metal" disaster recovery. However, Vista's Backup and Restore Center was missing some vital functionality: there was no way to create a Recovery Environment disc to boot your system (you were expected to use your Windows Vista DVD), file and folder backup and system image backup were performed with different programs, and Home Premium users who needed image backup had to purchase a third-party program. Windows 7 builds on the new features in Windows Vista's backup and fills in the missing functionality. To see how Windows Backup has been transformed from awkward adolescence into full maturity, keep reading.
 Starting Backup and Restore for the First Time
To start Backup or Restore functions in Windows 7, open Control Panel and click Back Up Your Computer from the System and Security category:
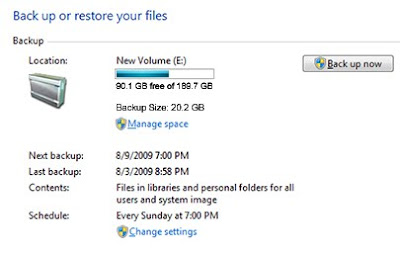
 Windows Backup and Restore has two panes. The right pane is used to configure and run backup and restore functions. This is the right pane for Windows 7 Home Premium (the focus of this article) before it is configured:
 The right pane for Windows 7 Professional and Ultimate offers additional links for system recovery:
 The left pane is used to launch backup-related tasks:
Setting Up Windows Backup
To set up Windows Backup, click the Set Up Backup link (1). Note that it is marked with a Windows Security shield, which indicates that users might see a User Account Control (UAC) prompt.
 Setting Up a Scheduled Backup Job
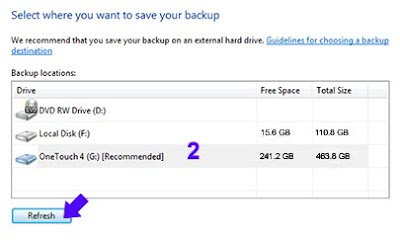
Next, Windows Backup displays suitable locations for storing your backup: internal and external hard disks and DVD drives are listed. To save the backup on a network share in Business and Ultimate, click Save to Network (Home Premium users can't use network shares). In this example from Home Premium, I selected a Maxtor OneTouch 4 (2), which has over twice the free space of my system drive. After selecting your location, click Next to continue. If you didn't connect your backup drive until you reached this step, click Refresh.
 When you use the default "Let Windows Choose" setting (3), Windows Backup creates two backup types in a single operation: a system image you can use for "bare metal" disaster recovery, and a backup of data files in libraries, the Windows desktop, and default Windows folders. Click Next to continue.

0 comments
Post a Comment